Glassworking over time
Ever since the discovery of glass materials, people all around the globe have come up with creative and complex processes through which glass can be manipulated to produce a great variety of products. In this article we are going to talk about glass blowers.
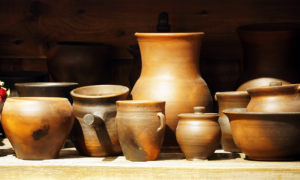
The art of glassblowing has existed for centuries, and it involves inflating a mass of glass, which has been previously softened by heat, by blowing air into it using a blowpipe and then being shaped as needed. This practice has made it possible to create more glass goods for people to enjoy.
The craftsmanship of this technique is no joke, it requires mastery and years of perfecting all the steps involved in the process. Glassblowing is only one of many popular glass manipulation techniques.
A few other popular techniques are lampworking: a process in which beads, figurines, lenses, marbles, and other art pieces are created; there’s also core-forming or casting, both of which make use of molds to shape the glass; another widespread method is glass fusing, which melts pieces together to form artistic and functional pieces.
Many advances in glass creation have occurred only in the last two hundred years, but the majority of glass manufacturing processes are ancient, therefore a great legacy for artists everywhere to preserve as time goes by.
What are glass blowers called?
Glassworkers have a lot of different names, depending on what kind of products they specialize in. People who blows glass are called a glass blowers, glass smith, or gaffers. A lampworker manipulates glass with the use of a torch on a smaller scale.
Both terms are commonly interchangeable, but they do present some differences when it comes to the practices they follow. If a glassworker only creates a certain kind of product, it is not uncommon to give them specialized names such as bead makers, pipe makers, etc.
The glass blowing process
When you think of what is done inside of a glassworking studio, there are several stations where specific steps are completed to fully finish glass pieces. Different specialized tools and pieces of equipment allow these steps to happen.
Step 1: Considerations
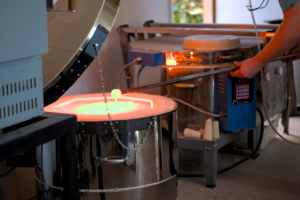
First, you’ll find a furnace with an interior crucible, a heat-resistant container in which molten glass is held. Then you’ll see a glory hole in which the glassblower safely forms their piece; the oven section of a furnace will make sure that pipes, punties, and other tools remain hot; and finally, there will be an annealing oven that will slowly cool down the finished work.
Starting a piece involves reaching inside the furnace’s crucible to gather some amount of clear molten glass using the end of a steel blowpipe. This molten glass is then rolled on a steel table (also known as a marver) so that it can be formed into a cylindrical shape.
Step 2: The heating
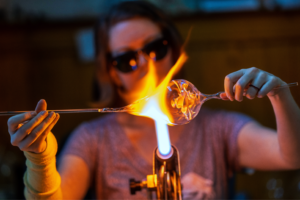
The next step is heating this glass inside of the glory hole while keeping the blowpipe turning, constantly moving. It is very important to keep the glass above a temperature of 1000°F, so returning to the glory hole for reheating the piece is rather common.
Up to this point, glass is still clear, and most projects involve colorful designs, so it is time to add some color at this stage. Colored glass comes in a variety of formats such as powders, frits, and bars. These are all used to produce unique designs and patterns that decorate glass pieces.
Step 3: Coloring
In order to put color into a clear glass piece, the glassblower will then take the heated glass on the blowpipe and roll it over the color, picking up parts of it with each roll. They then return to the glory hole to heat up all the elements, melting everything together. This whole time, artists need to keep turning the blowpipe, since keeping it moving will ensure that the glass piece remains stable at the end of the pole.
While turning the pole with one hand, the glassworker uses the other hand to manipulate the piece with tools such as cherry wood blocks, wet newspaper, wooden paddles, and tools made of stainless steel. Artists need to coordinate their movements so that they can produce a round piece, an oval form, or a wide-open shape for plates or bowls.
The right shape can only be achieved while heating, turning, blowing, adding color, and using tools to shape simultaneously. This also happens while going back and forth between the glory hole and marver. The marver is essential as a stabilizer which allows the artist to control the shape and temperature of the glass.
So far, many steps have prepared the glass for the most important stage: blowing. Reaching this point is truly a complex, intricate feat.
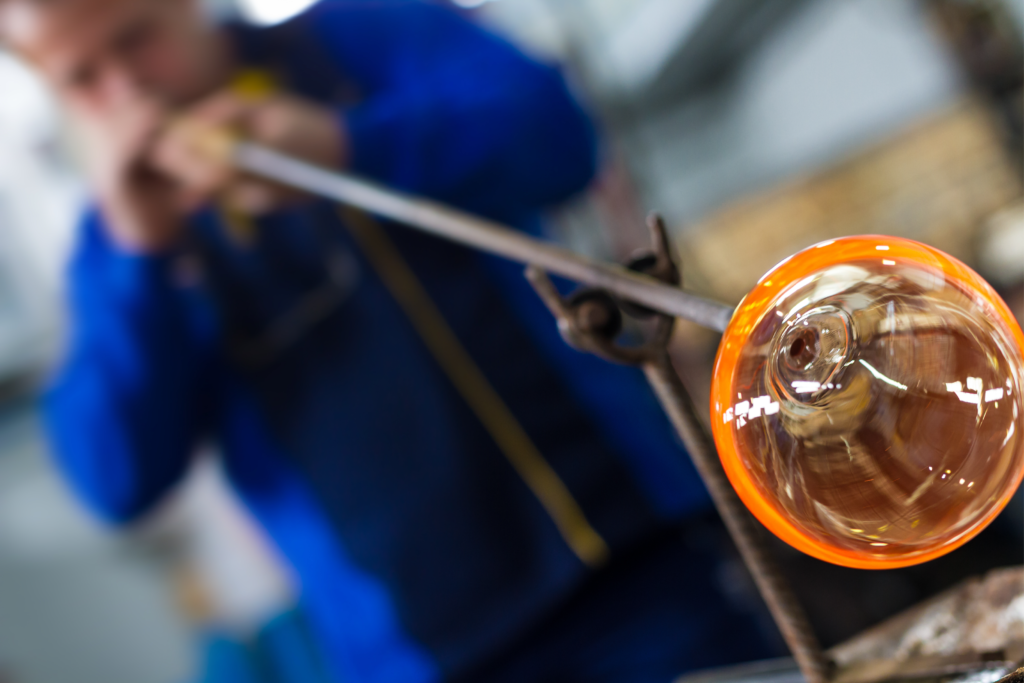
Step 4: Blowing shapes into glass
When the actual blowing begins, we’ll find glass blowers puffing on the end of the blowpipe to create a bubble. Once more, they must return to the glory hole for more heating and turning. Then, back to the marver to stabilize the piece.
More shaping is then done on the bench with multiple tools. “T” is a long, cyclical process that depends a lot on the desired final result. Size, patterns, and shapes will determine how long it will take and how many steps the production will take.
After going through these steps and reaching the desired shape, the piece has to be transferred to a punty. A punty is another steel pipe that’s been kept hot in an oven. Transferring the piece from the blowpipe to the punty will allow the worker to create openings, many times necessary for pieces such as vases or bowls.
The punty will be attached to what will become the bottom of the piece. It is necessary to take a small amount of clear glass from the furnace with the punty, then the glassblower will briefly stop turning the piece so that the punty with the molten glass is attached to the other end.
Working with very precise timing, the artist will wrap the blowpipe and let it break away, leaving the piece attached to the punty. Sometimes steel tweezers called jacks are used to separate the bottom part of the blown glass while rotating the blowpipe. Since there’s a separation with the jacks, the glass can be removed from the blowpipe with one tap.
There is a lot of dexterity involved in this step of the process since this transfer can sometimes result in a dropped piece. If a piece is dropped, there is no way to recover, the artist must start all over again.
Final Steps for glassblowing
The piece on the punty is again heated in the glory hole, then taken back to the marver to be manipulated using other specialized tools for creating the mouth of a vase or to open up a vessel.
Once the glassblower is satisfied with the piece, it needs to be removed from the punty. The artist will take the punty and hit it firmly so that the piece drops into a box that is filled with thick layers of fire blanket, safely catching it while it’s scorching hot.
The last step is to take the glass piece to an annealing oven using heat-resistant gloves. This allows the glass to cool slowly over the course of several hours, preventing it from breaking if exposed to quick temperature changes.
The art of pipe making
The creation of glass pipes for smoking is one of the most popular applications of glassblowing. These pieces are produced with traditional glassblowing techniques, yet the scale is much smaller, so the tools also change, to adapt to this particularity.
Glass blowers begin by heating a tube of glass, which then can be used as-is or divided into smaller sections to create even smaller pipes. Then, a step called the “neck stretch” ensues. During this step, the glassblower applies heat to expand the glass into a wide cylinder.
As it expands, the glassblower carefully turns and stretches the glass to create the main neck of the pipe. When the glassblower is satisfied with the length and size of the pipe neck, the next step is to form the bowl portions of the pipe.
This is done by applying a torch directly to the end of the neck while blowing into the cool end of the glass tube at the same time. This creates a bulb at the hot end, and as air is blown into the glass, the piece is constantly turned to maintain an even shape.
Once the bowl has been shaped, the glassblower uses a rod to gently press down in the center of the bulb, performing the “bowl push”. This leaves the necessary dent where matter is packed into and burned when smoking with a pipe. A special tool is then used to punch one hole in the bottom of the bowl for the mouthpiece, and another one is placed on the side of the bowl for the carb hole.
After that, the bowl is set on a flat surface and gently pressed down on, which gives the bowl a flat bottom that prevents the pipe from falling over when in use. Finally, the mouthpiece is shaped, and the entire pipe needs to be broken off of the initial glass tubing. The artist then smooths out the mouthpiece, eliminating any irregularities or sharp edges.
Glass blowers can let their imagination run wild while creating pipes, that’s why many have a lot of detailing and unique designs. The world of glassblowing is clearly very versatile, so pipes are just one small fraction of all the incredible products created through this fascinating technique.
Take a look in our online shop and discover the different glass blowing supplies that we have!