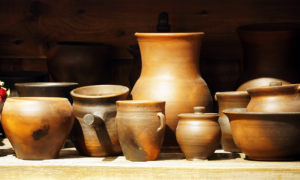
An enameling kiln is a small tabletop kiln used for testing glazes or decorating jewelry, glass, metal, or pottery. Enameling refers to the application of a hard and glossy decorative or protective coating that fuses with its substrate when fired in an enameling kiln.
Vitreous enamels are finely ground glass, like fine sand; they may be opaque or transparent, and in certain cases, they’ll come in different colors through the addition of various oxides. Enamels are like ceramic glazes, except that, whereas glazes are in a raw state when applied to ceramics and go through chemical changes in the firing process that smelt them onto glass, enamels have already been smelted.
Enamels come in powdered and liquid forms, but the powder version is the most commonly used format because it is easier to apply and comes in a wider range of colors. Enamel can be fused to gold, fine silver, copper, steel, and even platinum. The firing process simply melts them and fuses them to the surface material.
The process of enameling
There are 4 stages that enamel will progress through when heated: sugar, orange peel, full fuse, and over-fired. The sugar stage appears powdery, like fine sugar.
Firing up to the orange peel stage will give pieces a glossy, irregular texture; on the full fuse stage, surfaces appear smooth, shiny, and even; finally, if a piece gets to the over-fired stage, it may show some pits in the surface, black spots and sometimes the edges start deforming and/or changing color. Each stage is obtained by controlling the heat, which is where the proper kiln and programming come in.
Target temperature for enameling
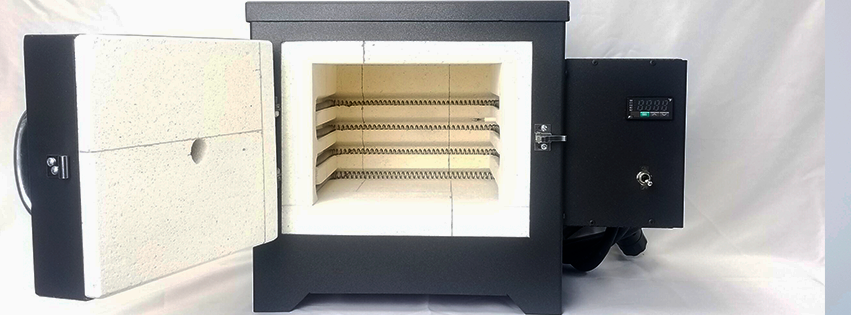
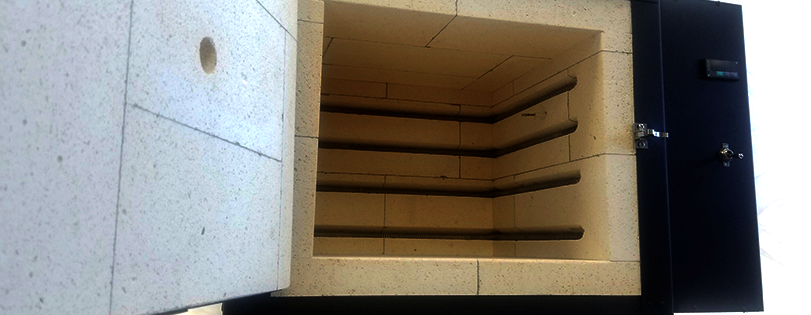
When using a kiln for enameling, the target temperature is around 1500 degrees Fahrenheit. Make sure your selected kiln is programmable to at least 1600° F so that multiple firing scenarios are covered. It is also highly recommended that small enameling kilns are front-loading, which is going to make loading and unloading a lot more convenient.
When firing pieces in a kiln, firing times will need to be adjusted according to your specific kiln, as well as the enamel being used, type and thickness of metal, and the size of the project as a whole.
Even if two kilns are the same model, it’s unlikely that they fire precisely the same. Because of this, you cannot base your firing times on others’ recommendations. Getting to know your kiln will mean working on test pieces to keep as color samples and practicing quite a few times before being able to master an understanding of your kiln’s firing times.
How to use your enameling kiln?
The process of firing your enameled pieces in a kiln goes as follows:
Step 1
Before firing pieces, preheat your kiln to 1500°F. If your kiln has the possibility of being digitally programmed, set the hold time for 6-8 hours to ensure enough firing time so the kiln won’t shut off in the middle of a project.
While the kiln is heating, prepare your metal piece. To ensure permanent adhesion from the enamel to metal, the piece must be cleaned properly. Doing so prevents the enamel from cracking or popping off the surface during cooling. Once clean, don’t touch the surface of the metal. Then it is time to apply the first layer of your design.
Step 2
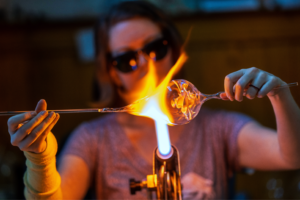
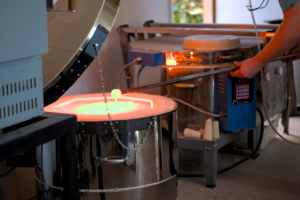
After that, transfer your piece to a steel mesh firing rack and/or trivet, to be fired. It is important to follow safety measures such as wearing kiln safety glasses and a heat-resistant glove, using a steel firing fork or spatula to place the firing rack in the center of the kiln as quickly as possible, and carefully closing the door. Doing this quickly will prevent the kiln temperature from dropping too much.
With experience, you’ll be able to recognize the different texture stages, so you do not under or over fire your pieces. A viewport might come in handy in case you want to keep an eye out for a specific texture being formed in the kiln.
Final Step
When the piece has fired to the correct texture, and while wearing your safety equipment, use your steel fork or spatula to remove the firing rack from the kiln. Set the rack on a heat-protected surface, and let the piece cool down slowly.
Jewelry enameling kiln
Adding a tabletop jewelry kiln to your studio is a great option for those looking to expand the possibilities of their creations. Portability, durability, material, temperature limit, and design are just a few of the characteristics that need to be considered before investing in a kiln for the purpose of enameling jewelry.
Having a digital control will definitely give the kiln bonus points since electronic controls allow you to set functions and programs for your projects so that continuously monitoring the kiln as it fires isn’t necessary.
If you plan to work with different kinds of metals, make sure to also check which types are compatible with your kiln. Some metals, like platinum, aren’t suitable for certain kiln models. To choose the appropriate kiln size, you need to consider if it will fit into your workspace and how many jewelry pieces you’re looking to fire at once.
The most common enameling techniques
There are over 200 enameling techniques, but here are five of the most common:
- Cloisonné:
Small wire enclosures are filled with wetted enamel particles, and they’re later fired. This is an ancient technique for decorating metalwork objects in which colored material is held in place or separated by metal strips or wire, normally made from gold. The appearance of this technique gives the colors in the pieces an outlined look.
- Grisaille:
It involves the application of white enamel to a black enamel background, creating halftones and shading. This technique will surely give a dramatic effect to your pieces.
- Champlevé:
The metal’s surface is embossed by hammering, stamping, or carving to form dents or hollow areas in which enamel is applied. The original metal remains exposed and is not enameled. After firing, the enamel builds up in these are and the result is a mostly smooth surface.
- Limoges:
It has been used as a way to work the enamel into fine paintings. It is the most common type of painted enamel.
- Plique-à-jour:
A vitreous enameling technique in which the enamel is applied into cells made of gold or silver wire, yet there is no metal backing. This way, light can shine through the enamel and the piece has a stained-glass effect.