Welcome to ceramics 101. In this article we are going to introduce you to ceramics and everything in relation to this beautiful and unique art.
What are ceramics?
To better understand this ceramics 101 article, first we need to know what are ceramics.
Generally, the term ceramic refers to a type of substance. Ceramic substances are durable and resistant to high temperatures, chemical corrosion, and pressure; they are also poor electrical conductors and they’re usually non-magnetic.
Broadening the term’s definition, it also describes objects which have been formed with clay, hardened by firing, and decorated or glazed.
Ceramic objects are used for both artistic and practical purposes; common uses are dinnerware, decorative sculptures, and even building materials. The composition of the clay used in these pieces will determine the category of ceramics they belong to.
Different types of clay and combinations of clay with different variations of silica and other minerals result in different types of ceramic pottery. There are three main types: earthenware, stoneware, and porcelain.
Different types of ceramics
Ceramics 101 envolves different types and styles of ceramics. Next are the main kinds of ceramics that you can find.
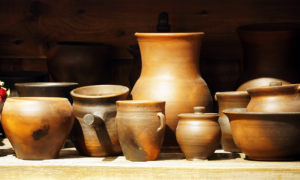
Earthenware
This type of ceramic pottery was the most common type of ceramics until the 18th century. Earthenware refers to pieces that have not been fired to vitrification, which is the process of crystalline silicate compounds bonding into non-crystalline glass compounds. This makes the pieces more porous (they have small holes through which liquid or air can go through), and rougher to the touch.
Earthenware is fired at relatively low temperatures of between 1800° to 2000° degrees Fahrenheit, which results in a hardened but brittle material and cannot be used to contain water.
Terracotta, a clay-based and unglazed ceramic, is one of the most popular types of earthenware. Nowadays, we commonly see planters made from terracotta; bricks and water pipes are also still produced with this kind of ceramics.
Stoneware
Stoneware refers to a vitreous or semi-vitreous ceramic, which means it is coated in glazing to make it appear glassy and to make it nonporous. This type of ceramic results in more durable pieces, with a denser, stone-like quality.
They are fired at much higher temperatures compared to other ceramics, usually reaching around 2200°F. Since they typically harden into earth-tone colors because of impurities in the clay, pieces are usually glazed. However, stoneware products will be waterproof, so they do not need to be glazed.
Porcelain and bone china
Throughout the 16th century, low fire earthenware was the most common type of ceramic in Europe and the Middle East. Chinese potters, however, developed their own techniques and tools, introducing high-temperature kilns and developing porcelain from kaolin clay (highly refined clay) around 1600 BC.
Trade during the Middle Ages allowed for porcelain and high-temperature kilns from the East to spread to the rest of the world, enriching the traditional practice of potters in the West.
Porcelain ceramics are made by heating kaolin clay in a kiln to temperatures between 2200°- and 2600°-degrees Fahrenheit.
This is a very durable and heat-resistant material compared to other types of ceramics because of the vitrification process, which allows the formation of a silicate mineral called mullite when fired. Common kinds of porcelain ceramics include tiles for the bathroom or kitchen, vessels, decorative sculptures, etc.
Bone china, also known as fine china, is a type of porcelain that is known for its translucency, high strength, and resistance to chipping. A combination of bone ash, feldspathic material, and kaolin clay makeup up its raw materials.
These ceramic products can be shaped into thinner forms than those made from porcelain because bone china has truly remarkable strength.
Comparing earthenware, stoneware, and porcelain, we can notice that the main difference lies in the temperature at which the clay is fired and the resulting strength of the pieces, as well as their water resistance and their durability. The quality of the finished pieces will depend on the quality and purity of the clay in them, but generally, stoneware and porcelain will be the two more durable forms of ceramic.
How are ceramics made?
In ceramics 101 we understand that you may wonder about, how ceramics are made.
Once you have your clay ready, there are three common techniques to create ceramic objects: hand-building, wheel-throwing, or mold casting. Hand-building usually involves very few tools; wheel throwing works to create symmetrical pottery, and slip casting is used to create multiples of one object.
Hand-building methods
Before the wheel was invented, hand-building was the only available technique to create ceramic pots. We now know that the oldest ceramic artifact was hand-built and has been traced back to a time around 28,000 BCE.
For this technique, all that is really needed are some clays, your hands, and a few simple tools. Hand-building is made up of three main techniques or forming methods: pinching, coiling, and slab building. When you first begin to work with clay, pinching pots is a great way to be introduced to the material.
Coiling and shaping
To begin, a ball of clay should be shaped into a pot using only a pressing motion from your thumb into the center of the ball. After that, the ball must be spun with one hand while walls are pressed out with the thumb.
Coiling requires a different set of movements: first, coils of clay are rolled out individually and joined together to create a larger piece. Pots made through coiling may be shaped in any way possible, and there are no size limits.
The pinching method may be combined with coiling by making a shallow dish with the pinch pot method which may serve as the base for the coils to be added onto. In order to keep building, continue adding coils until you are satisfied with the shape and size.
Slab building
The final hand-building method is called slab-building. As its name suggests, you need to create slabs by processing them through a slab roller. Slab rollers are a type of tool which essentially look like industrial-sized rolling pins.
Clay needs to be placed on the cloth part of a slab roller, then its wheel is spun to move the clay through. A pointed tool is then used to trim the slab to its desired size. Paper templates may be useful to mark the shape of your project onto the slab, allowing for a cutout to be made.
A slump mold can also be used to create uniform shapes for things like plates and bowls. If that’s the case, the slab of clay is rolled out and draped over or inside the slump mold. To join two slabs together, a process called “score and slip” is used.
Scoring clay refers to scratching marks on the two sides that will be joined together. After scoring, you will brush slip (watered down clay) on each side to achieve the effect of gluing the sides together. The final piece is then smoothed with specialized tools so that it looks uniform.
Wheel throwing
Wheel throwing refers to the process of shaping and forming clay into functional shapes on the pottery wheel. It is also used for adding finishing touches to pottery, which may come in the shape of lines or freely drawn designs.
As the wheel spins, small dents or surface changes are rapidly applied to the clay, and this is where its shape and features begin to become visible.
Slip casting
This technique was developed to facilitate the creation of shapes that are not easily made on a wheel or by hand. In this method, a liquid clay called slip is poured into plaster molds and allowed to form a layer, known as the cast, on the inside walls of the mold.
The process usually takes at least 24 hours per piece. It results in very exact and constant shapes, hence why it is now the most common technique used for commercial mass-produced pottery.
Ceramics 101, different tools to use
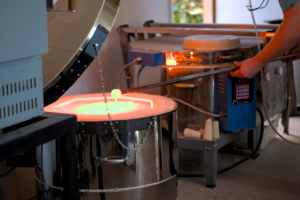
Only a few materials and tools are required to get started with ceramics. The essential items are clay and a kiln, but there are also many optional tools that can add texture and depth to your pieces.
Alongside modeling tools, safety equipment is highly recommended due to the dangers that working with high temperatures poses. Here’s a list of the most common tools to aid you in the modeling process:
- Wirecutter: used to cut off smaller pieces of clay from your larger piece.
- Pin tool: a sharp instrument used to cut and pierce designs on clay, adding texture. (Second-hand dental tools may also be used to create unique textures on the surface of ceramic pieces).
- Scoring tools: necessary for joining slabs together
- Slab roller and canvas sheets: used to roll out slabs of clay to an even thickness. A rolling pin and two canvas sheets will easily substitute these tools, with the downfall that this alternative will require a little more effort to produce even slabs of clay.
- Banding wheel: it allows you to easily rotate your clay and make it easier to work on your piece.
- Brayer: useful for rolling out and smoothing the edges of your clay, particularly the lips of bowls and cups. It may also help in adding texture to the clay’s surface by impressing objects between the clay and the brayer.
- Templates: to act as patterns for projects.
- Rubber rib: to smooth out the surface of the clay.
- Fettling Knife: for cutting, trimming, carving, and decorating.
- Spray Bottle: to prevent the clay from drying out by misting it with water.
- Sponge: to moisten the surface of the clay and keep the surface smooth.
In terms of safety, a ceramics apron and heat-resistant gloves are the basic items to keep you protected and avoid any possible accidents.
Ceramics 101 is all just a small introduction to the infinite possibilities ceramics allows for. Through practice, artists can plan and materialize their vision by exploring the many combinations of materials, designs, and techniques the world of ceramics has to offer. It is one of the most versatile forms of art, which is sure to challenge and inspire creators everywhere.
We hope you enjoyed this ceramics 101 article. Visit our online kiln shop, and take a look at what you can do using the knowledge this article gave you, and the kilns we have available at JPSKILNS.


